Pages

Showing posts with label Beauty. Show all posts

Thursday, August 13, 2015

Lindi Skin Care Review


When it comes to trying new face products I'm usually for it. I've been lucky in that I don't have acne  or complicated skin. Most nights I don't even wash my makeup off at night and have never had a facial. Two issues that I do have with my face is dryness after washing, some redness on my cheeks, and dry lips. Perhaps I haven't found the right moisturizing face wash, but I've been through a few and still, I always have to immediately put on lotion a few times before my foundation. 

I had recently run out of eye cream when I was asked if I would like to try a few skincare products from Lindi Skin care, so of course I said yes and hoped one of the products was going to be a eye cream. Much to my delight one was included in the package and that same night I tried all the products after washing off my makeup. 


The first product I tried was the Lindi face wash. It's a gentle alternative to soap and washes without stripping and works to achieve optimal pH balance. I enjoy alternating this face wash with the regular one I use. It is very mild.


Right after using the face wash, I towel off my face and apply the face serum. The serum is formulated with botanicals, antioxidants and vitamins. It provides beneficial moisture and ultimate comfort to compromised skin on the face, neck and chest. I love the citrus smell! I actually feel like it helps wake me up in the morning. It's very light weight and glides on smoothly. It's my favorite out of all the products.


After the serum I apply a little bit of face cream and then the eye hydrator. The hydrator is a moisturizing gel formulated to improve skin tone. It also helps reduce puffiness and improves skin tone. So far I'm liking it, but I'll have to try it a few more times to give a good verdict on it. I do suffer from puffiness due to lack of sleep so I'm looking forward to continuing to use this product.


The last step I do before makeup is apply the lip balm. It's supposed to help soothe and hydrate dry lips and cuticles. I've been using it often and I really like it so far. It glides on smoothly and I feel it's been helping with my dry lips.


About Lindi Skincare

The Lindi Skin brand was created in 2003 as the first complete skincare line designed specifically for the unique needs of people undergoing cancer treatment. Its safe, gentle clinically-proven line of skincare is perfect for anyone with compromised skin. General consumers select the products because of their gentle nature and reliability. Lindi Skin uses the most healing botanicals and antioxidants to deliver ultra-hydration resulting in healthy and protected skin. Lindi skin can be purchased on the brand's website or in select drug and cosmetic stores as well as medical centers. 

If you'd like to try Lindi skin. Use the code: BLOG25 (for use at lindiskin.com) and enjoy 25% off all products and free shipping! This promotion is good through September 30th and the company will also make a donation to the American Cancer Society's "Look Good, Feel Better" program for every purchase through this date.


I was sent these products to review but I was not compensated for this post. All thoughts and opinions are my own.


Wednesday, August 6, 2014

50 shades of brass


I have had an issue with my hair turning brassy since I started dyeing my hair in my 20's. In the beginning--when I didn't know any better I used to walk into a local hair salon asking for a light brown hair color and walk out with a head full of rust. Looking back I'm like "why didn't my parents say anything!" It was horrid. Or maybe it wasn't that bad, I mean my now husband fell in love with me around that time so I guess he dug it.
See I wasn't exaggerating.
 
I didn't know at the time that color doesn't lift color. It wasn't until I met Sami Arjorna of A Touch of Red Salon in Houston that taught me that and corrected and transformed my hair. She would use hi-lift and her balayage technique so I could finally achieve that lighter brown sun kissed look.
I saw her for a few years and then it just started to get too far for me to drive too and then Layla was born and I had less time to get away. I then started to see my high school friend Martha at Highland Salon in Katy. I've been seeing her for the past few years and I love going. Every time I leave I'm happy and have yet to be disappointed.

The last time I got my hair colored was in May and unfortunately, it seems like that one week at the beach really turned my hair super brassy. I did have to wash it almost daily so I know that had a lot to do with it as well.
You see how orangey it got? My hair hasn't grown that much to warrant another trip to the salon, so I thought I'd take matters into my own hands and try a toner from Sally's Beauty Supply. After reading several reviews and watching a few YouTube videos I decided to go with the brand Wella color charm in T18 light ash blonde. It seemed like most of the reviews were for blondes and I was a little nervous because I couldn't find that many on hair color like mine, but I went for it anyways.
Supplies needed:
 
*Hair toner
*20 developer
*Mixing bowl (You can buy one or use any bowl really)
* Squeeze bottle or color brush
*Rubber gloves
 
The firs thing I did was dampen my hair. There was mixed reviews on whether to use dry hair or wet hair, but the consensus was that you should do it on damp towel dried hair.
So once your hair is damp, go ahead and mix 1 part toner and 2 parts developer. So basically, dump the whole toner in there and then fill the toner bottle with developer 2 times and dump it in there as well. Give it a good mix. It's going to be milky white at first and then turn purple. I wasn't sure if I should have waited till it turned purple to apply because every where else I read, it said to put on the toner fairly quickly once you mix it. I'm going to go ahead and say that I don't think it matters if you wait for it to turn purple or not. Start at the bottom of your hair and work your way up.
On the box it says leave on for 20-30 minutes but don't go by that time. The toner can start working in as little as 5 minutes. So it can take anywhere from 5-30 minutes. You need to watch it. That statement I was confused by. I had no idea what to look for. It wasn't until 13 minutes had passed that I understood. I started to see the difference. The orange was going away and the ash was coming through.
I gave it a total of 20 minutes and then washed it out in the shower with lukewarm water. I used shimmer lights also from Sally's which is a blond/silver shampoo that you can use if you have brassy hair. My hair stylist recommended it.

Afterwards, I blow dried my hair and styled as usual and this was the end result.

Overall I'm pretty happy with the result and I would do it again. I was expecting a bit more ash I suppose, but it could be a matter of maybe not picking the right shade. It did make the highlighted strands blonder and while to me it may still seem a tad bit brassy, it's definitely not the orangey red it was when I got back from Florida.
 
I hope this tutorial helps if your hair tends to turn brassy like mine. Have a great Wednesday!


Thursday, February 27, 2014

Beauty Glam Now


A couple months ago I had the pleasure of getting acquainted with Beauty Glam Now due to my business and I'm so glad I found them! They are a beauty and lifestyle website based in Beverly Hills featuring all things glam and fashionable. From beauty tutorials to home trends and many things in between, you can definitely find some inspiration here! They also feature amazing brands and shops and recently launched a kids section. 


Head on over to their website for some amazing inspiration and stay tuned to see a feature on my shop FHJ Baby. I can't wait to see what they come up with!


Monday, May 21, 2012

Beauty talk..

I actually have two products to talk about today and a video to show you on an awesome trick to conceal under eye baggage. I'm sure all you mommies with babies that keep them up are going to love this!

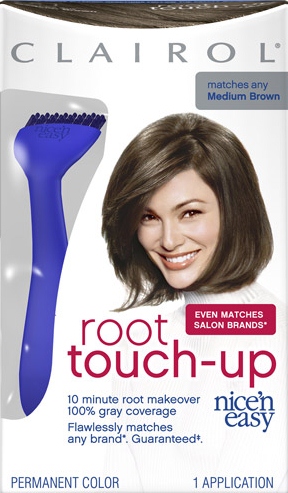
I'm going to start with a negative review first. As I mentioned before, my roots are pretty bad right now but not noticeable in my last post below, which is one reason I'm kicking myself because I should have just left well enough alone. Well I purchased Clairol's root touch up this weekend from Walmart and I applied it this morning. Let's just say I'm very dissapointed. I left the dye on even longer than the recommended 10 minutes and it hardly took. In fact my roots look even darker. I hate it. That's what I get for thinking a $5 product was going to do anything. The thing is I've used it before years ago and it worked fine.

Never again!


So yep, now I'm just going to wait another 1-2 weeks before I decide what to do next.

Another product I purchased was Maybelline's instant age rewind eraser dark circles treatment concealor. I know this one has been around for awhile now but I'm just now trying it. I usually use a Laura Mercier concealor but I ran out and thought I'd try this since I've heard good things about it.


I'm happy with it and I recommend it. It does a really good job. I have to say the texture is a little thicker than Laura Mercier's concealor but overall I feel the coverage is the same. I've heard the applicator is a little tricky to use at first and I did have to give it quite a few turns the first time, but now it comes out easy. I just dab a little on and then blot with my sponge.

Earlier this year (back when miss Layla was still not sleeping through the night) I was searching YouTube for some good under eye concealor tricks and I found a video with a trick I've never seen before. What a novel idea! You must watch and try it for yourself. I've been doing it ever since, only what I do is I conceal the under eye are as I normally do and then put a little more concealor just along the shadowy area and blend down. Watch the video and you'll see what I mean.


Saturday, March 3, 2012

Beauty on a budget

Olive oil face & body scrub 

Lately because of the temperature fluctuating and staying indoors alot, my face has been super dry and dull. I made a simple scrub using three ingredients:

  • Olive oil
  • Sugar
  • Honey


In a small bowl, mix 2 tablespoons of olive oil, 1 tablespoon of sugar and half a teaspoon of honey. You can always change the consistency later. Mix it all around and it should resemble a paste.


Apply to your face and rub in small circular motions. Be gentle because the sugar is a little rougher than the average scrub you find at the stores.

When I applied it, I did it in the shower and used the rest on various parts of my body, like elbows, knees and feet. You can apply anywhere and by doing it in the shower, it was easy to clean up.

My skin definitely felt softer and more hydrated after using this scrub.

Give it a try!